
Stihl is one of the world’s leading power equipment manufacturers, and for good reason. The German brand has dedicated the last century to producing products that are efficient, durable, affordable, and easy to use.
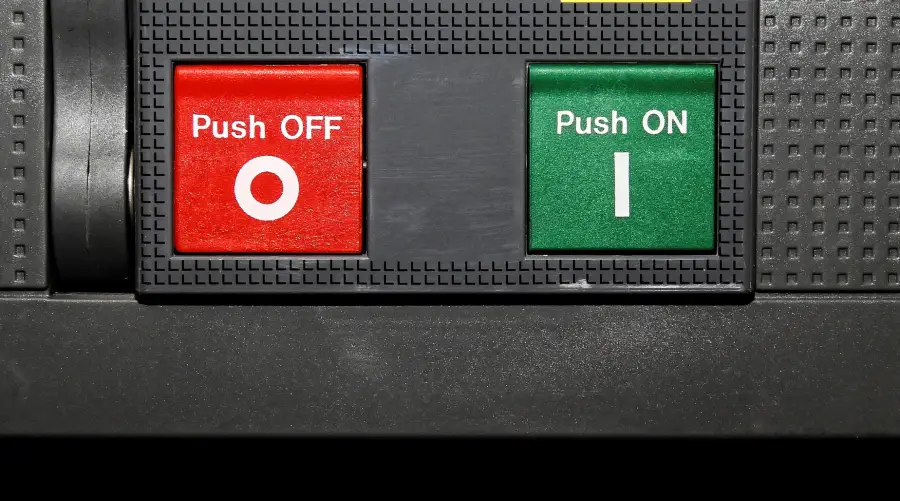
On any Stihl machine the on position of a switch is signified by the I or 1 symbol and the off position or kill switch position is designated by the O symbol. This is also true for most brands of landscaping equipment or many other types of electrically powered items.
Of the four dedicated focuses listed above, our focus today is on the latter quality, as we zoom in on how easy it is to get your Stihl machine up and running. We will be talking about the meaning of on-off symbols before we take a look at the overall functionality of a trimmer switch and some common problems with kill switches.
Let’s begin.
Contents
Stihl On-Off Switch Symbols
While starting or shutdown sequences may vary across individual machines, pretty much every Stihl machine we can think of has an on-off switch.
And pretty much all of these switches feature the same pair of symbols… “I” and “O”.
Or is it “1” and “0”?
Well, according to the International Electrotechnical Commission (IEC), it’s neither. The symbol is officially regarded as “line and circle”, mainly to bypass potential language and regional barriers of the more literal “on/off”. The separate line and circle are also derived from the equally famous “stand-by” symbol, which features a line in an incomplete circle.
Computer-oriented thinkers tend to interpret the symbols as a 1 and a 0 due to similarities with binary computing. In computer language (so to speak…no pun), 1 represents a positive value (“yes” or “on”) while 0 represents a neutral or negative value (“no”, “off”, “ignore”, etc.).
With these switches the line almost always represents “on” and the circle means “off”. In fact, IEC standards dictate this, so it’s extremely unlikely for any manufacturer to err on what is a pretty basic thing.
Of course, a shoddy repairman or two may have replaced some switches the wrong way around, but such is life. However, even that hardly ever happens.
What Does The Switch ON A Trimmer Do?
A trimmer switch (aka “kill switch”) does pretty much what an on-off switch does…it turns the machine on or off.
Switching to the line (or “1”) completes the electric circuit which allows the trimmer’s motor to run (for electric trimmers) or sends power to the spark plugs in the engine (for combustion trimmers).
So, when starting an electric trimmer, you engage the switch, press the starting lockout lever, and squeeze the trigger. You then disengage the switch to cut off power.
The process of starting a combustion trimmer has a few extra steps…
Once you’ve ensured that your trimmer has enough gas, you have to press and hold the throttle trigger interlock and the throttle trigger itself. With both levers held down, you must then move the power switch to the “on” position.
Next, you can then release the levers and set a full choke if the machine is cold. If the trimmer has been used recently and is still warm, you can set a half-choke. After this, you should then press the fuel bulb repeatedly to fill it up with fuel before pulling the starter cord to start the trimmer.
To cut off a combustion trimmer, all you have to do is disengage the power switch.
More great articles just for you…
- Are Stihl Trimmers 4-Cycle? (Answered)
- Stihl vs ECHO Hedge And String Trimmers (Germany Vs USA)
- Which Choke Symbol Is On Or Off On Your Lawn Equipment?
Kill Switch Problems On A Stihl
Unfortunately, Stihl machines (like many others) can fall victim to certain problems that disrupt their operability.
The kill switch is one of the parts that can give you headaches. Defective kill switches can lead to problems like failure to start and failure to…er, kill, the machines in question. It’s not unheard of for an operator to have to yank out sparkplug wires to cut off a trimmer or chainsaw that keeps running despite attempts to disengage the switch.
Of course, to be sure that the switch is indeed the problem, you will have to dig deeper.
Check Your Kill Switch
The best way to check your kill switch is to use a multimeter (Amazon link to the one I suggest) and test for continuity. You will also need a screwdriver for this.
Safety first, of course, so you want to be sure your trimmer/saw is off and cool before you start opening it up.
Next, you should note the position of your switch and determine how you will have to disassemble the machine. Some switches are on handles, which often requires the separation of those handles. If the switch is on the machine’s main body, you will have to remove a panel or two.
Use a screwdriver of appropriate size and shape to separate these panels or handles and disconnect the switch from its electrical leads.
The next step is to take your multimeter and join the leads together. Set the multimeter to the Ohms setting and select a scale that produces a reading of 1 when the leads are touching each other. A 1 reading means current flows freely between the two leads…which means there is continuity. Separating the leads will result in a value of 0 or OL (no continuity).
With the help of a friend, move the switch to the “on” position and place the multimeter leads on the terminals that were previously hooked up to the machine’s electrical leads. If there is continuity across the switch, the multimeter will give a 1 value. If you get a value significantly lower than 1, the switch might be damaged, which disrupts continuity.
Next, move the switch to the “off” position, ensuring the leads stay in place. The multimeter should give a 0 or OL reading, which shows the flow of current. Any value higher/other than 0 or OL indicates a fault in the switch.
To be certain of your findings, you can play around with the switch and swap the leads. If your switch is giving you the appropriate readings, you can be sure that it is working well and doesn’t need replacing. In such a case, starting or shutoff problems may be related to your machine’s electrical leads or ignition system.
Replacing Your Switch
If your readings indicate a bad switch, there is little you can do besides replacing the switch. The manufacturer may do this for you if the machine in question is still under warranty. If you aren’t under warranty, you can head to your local repair shop and get a replacement installed for a modest fee.
You can also scour the internet for replacement switches for your particular machine model and carry out a DIY installation if you wish.
The Final Touches On A Stihl On/Off Switch…
Knowing how your switch works on your Stihl or other brand machine is important and fairly straight forward. The I symbol or 1 if you are computer language minded is for On or initiate, and the O symbol signifies killing the power or off.
Testing a bad switch to determine if it is the problem is best done with a multimeter that can be picked up from a local hardware store or from the online retail giant, Amazon. With this handy device, you can test the leads on your switch to see if it is the problem.
If it is the issue, your best bet is to get an authorized repair done, which usually entails replacing the switch.
Hopefully this has cleared up your issue with on/off switch with your Stihl or other brand of lawn care equipment.
To read more articles like this one from LawncareGrandpa.com, see these…
- How Long Does A Stihl Trimmer Last? (Revealed)
- Weed Eater Vs Trimmer: Is There A Difference? (Revealed)
- What Is An Electric PTO And Is It Better Than A Manual One?
References