
After a busy week of work, you finally have time to give some overdue TLC to your garden. When it’s time to spruce up your lawn, you hop on your riding mower only to find that it won’t move. What could be the problem? More importantly, can it be fixed?
A riding mower will not move forward or backward if there are issues with the drive belt, terrain, gears, hydraulic fluid, pressure switch, or key stock. Knowing what to look for and where to check can make the process of getting a riding mower moving again much simpler.
These are the situations we will be addressing today, as we list the possible reasons why a riding mower won’t move forward or backward. In addition, we’ll also point out solutions for each of these issues. Let’s get started!
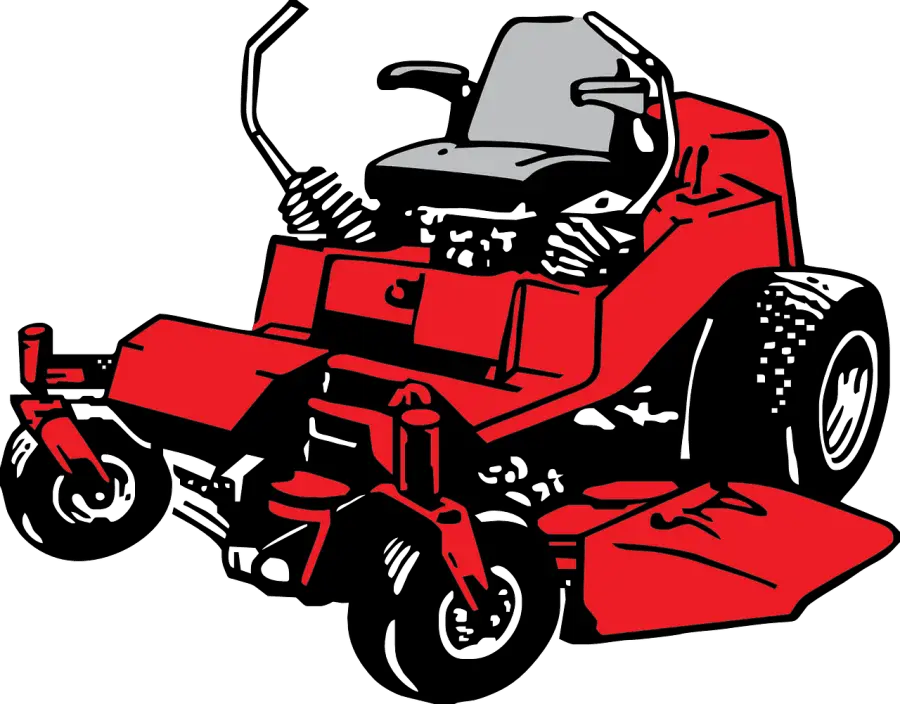
Reason 1: Mower Drive Belt Slipping Or Damaged
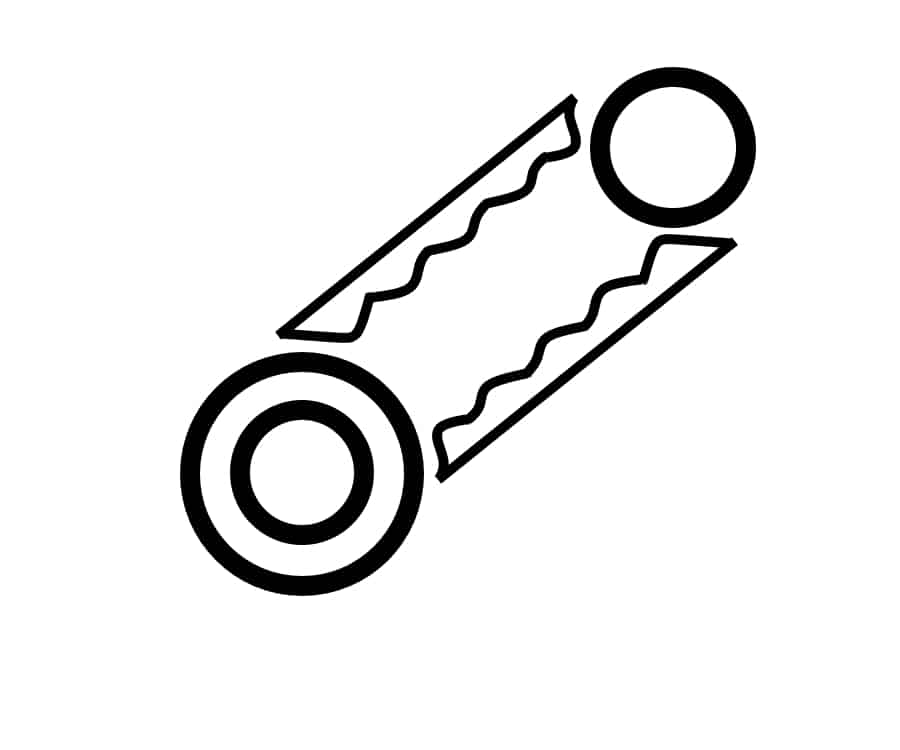
The drive belt is a key component in both ridden and push mowers. However, it has the added benefit of connecting a ridden mower’s motor to the rear wheel axles. Essentially, it facilitates the conversion of horsepower to actual movement.
Mower drive belts slipping is major reason some riding mowers won’t move forward or in reverse. These belts connect the energy produced by the motor to the axle hooked to the drive wheels. Old, excessively worn, or defective drive belts can slip instead of relay the energy required.
Naturally, the mower’s mobility would be negatively affected if anything were to happen to the drive belt’s integrity. Unfortunately, that is exactly what happens to these key components over time due to gradual wear. Once the belt is completely snapped or ground, the axle loses its link to the motor and the mower fails to move.
This is a common occurrence for mowers that have been in action for a while without ever getting a new belt. Barring extraordinary circumstances, new mowers won’t encounter this problem for a while…but always verify just in case some failure or external wear hasn’t occured.
Fix: Replace Drive Belt
Eventually, you will need to replace your drive belt. There are several options for you from Amazon and several aftermarket suppliers. Some manufacturers may also offer replacements as part of a warranty.
Replacing the drive belt by yourself is a pretty simple process. It is important to carry out all your DIY mower maintenance and repairs on a paved surface rather than on grass. You never know what small parts could fall out. Safety gloves are also a good idea.
- The first step is to ensure that the ignition is OFF. Next, open up the hood and detach the spark plug. This is done by disconnecting a wire (or wires if the mower has two cylinders).
- The second step is to lower and detach the mower deck. This process involves the removal of the cutting blades, the blade belt, and mower deck supports.
- Next, you must remove the engine pulley from the crankshaft and start detaching the drive belt from the bottom of the mower. You have to then lift the mower seat, detach the battery and battery case to access the transaxle pulley near the top of the mower. Detach the other end of the belt and pull it out.
- The fourth step is to install your new drive belt. Loop it around the transaxle pulley first before replacing the battery and case. Next, loop the other end of the belt to the engine pulley.
- Finally, reinstall the mower deck and spark plug before giving the mower a whirl.
Reason 2: Lawn Mower Stuck In Mud
It definitely can be embarrassing when it happens, but if a riding mower is used often enough, the odds are pretty good that you will find yourself in this situation. The process becomes exponentially more difficult the larger the mower is.
A lawn mower stuck in mud is due to a lack of friction. The wheels are not able to create enough friction with the wet surface to move the mower forward or backward. In order to get the mower in motion again, other forms of material will be needed under the drive wheels.
The same principles of physics apply with many surfaces:
- mud
- snow
- ice
- sand
- wet inclines
The friction has been compromised that the tires can normally generate along the ground. The surface is movable or actively moving in a way that won’t allow the wheels to ‘grip’.
This may sound like a simplified explanation, and that is because it is. This simple understanding makes the straight forward fix easy to understand.
Fix: Use Material Under Mower Wheels To Regain Friction
This simple solution works even better than you might imagine. The material needs to usually be in ‘sheet’ form though in some instances piles of unconnected material will also work.
Using another material that has potential surface friction can then be used by the tires along with the weight of the machine and even you to pull itself out of most slippery situations.
We have even at times had to rescue a large expensive mower that found itself stuck in very loose soil at the bottom of a steep inclined bank. We used various material and several guys running it from the back to the front of the slowly ascending mower to create a kind of moving bridge over the soggy soil.
Here are some suggestions when looking for this friction substitute for you stuck mower:
Sheet Or Panel Material
- Hauling trailer decking sheets
- Chain link fence panels
- Composite or plastic trellis or lattice work panels
- Plywood or chipboard sheets
Other Material
- Sand (for icy applications)
- Gravel
- Large wood chips
- Lengths of chain
Reason 3: Lawn Mower Stuck In Gear
Some riding mowers are meant to have their gears changed while in motion and some are not. Some use a manual clutch and some are more automatic in their operation. It is important to know what your machine’s manufacturer designed the mower to do.
Lawn mowers stuck in gear are due to factors of either wear and tear or operator error in adjustments. Making improper adjustments in break, clutch, or transmission systems can all be culprits. This combined with normal deterioration of parts can cause mowers to be stuck in gear.
There are some instances where adjusting the break tension instead of replacing worn break disks or ‘pucks’ can increase the brake efficiency, but will hinder the gear shifting process.
There are a multitude of issues this could be from the lubrication in the brake pins to worn parts connected to the transaxle. The make and model of your machine will determine some of it and a thorough check of the connected parts will be necessary.
Fix: Here A Professional Can Save You Time And Money
Giving a simple fix to transmission related problems is not a helpful solution. There are many things that determine the course of action when dealing with transmission issues. Some are the make and model, and some are the condition of the parts involved.
In most issues not resolved by the other tips in this article, you will be dealing with a transmission repair, which is usually above the skills of the average home owner or novice landscaper. If you already know how to do this sort of repair, then this article was not intended for your issues in the first place.
For those not skilled enough to deal with transmission type repairs, a professional small engine expert should be sought. In the long run this will save you time, money, and much of the hair on the top of your head.
Reason 4: Aged Hydraulic Fluid In The Transmission
This is another common issue for riding mowers. Hydraulic fluid allows the transmission to run smoothly and engage the mower’s gears. Over time, this fluid loses its ability to effectively lubricate the transmission, which would cause mobility issues.
Seasonal changes can accelerate this process. Winter is especially problematic, and very cold areas might necessitate regular changes.
This also comes about with regular use through normal wear and tear. Just like many of the other fluids in most types of engines, levels need to be monitored and entire changeover is needed on a regular basis. Some fluids require rare changes, while others need it more frequently.
Hydraulic fluid is one of those in the more rare category to become low, but change is needed even if infrequently. If the fluid is leaking or running low constantly, this could definitely be the source of your mobility issue.
Fix: Replace Fluid
Again, this process can be done by professionals or at home. The process involves letting the old fluid drain out via the drain plug hole. Once drained, simply pour in new fluid.
Proper disposal is another issue and one reason many seek out the help of professionals. As with many fluids in motors of all types, simply poring them down interior or storm drains is not an option.
Make sure you use the appropriate fluid for your mower. Consult your mower’s manufacturer directly if you are uncertain.
Reason 5: Broken Seat Pressure Switch Restricts Motion
For safety, a lot of riding mowers make use of a device called a pressure switch. This is essentially a sensor that restricts the mower’s movement if there is no pressure in the seat (i.e., no one sitting in it).
While this is a very useful feature, it can be problematic if the switch starts malfunctioning. In such a scenario, the mower won’t recognize seat pressure and it will restrict movement in any direction.
Fix: Replace Pressure Switch or Seat
A new pressure switch should do the trick here. Find and install a sensor that works with your mower model and test if it works.
The seat could also be a problem in rare circumstances. It may be dislodged from its regular position and fail to connect to the switch properly, resulting in a stationary mower.
To correct this, you must adjust the seat to its rightful position. If the dislodging is a result of wear, you should replace the seat.
Reason 6: Air In Hydraulic Fluid Lines
Aging isn’t the only problem that plagues your mower’s hydraulic fluid. Air bubbles are just as likely to disrupt your grass-cutting. Air in the transmission lines will cause engine sputtering at first and, if you let the bubbles get bigger, the mower will eventually stop moving.
Fix: Remove and Store Hydraulic Fluid
The best way to deal with air bubbles is to prevent them. If left unchecked, this air can cause untold damage to your mower, so it is best to nip this problem before it causes serious damage.
If you plan on letting your mower sit idle for a while (i.e., during winter) make sure to drain it of all hydraulic fluid. Let the fluid drain into a container and store it safely. Replace the fluid when it’s time to use the mower again.
This can also sometimes cure the air pockets that develop in the system. Make sure the fluid pressure is appropriate when you reinsert it and this should fix any problems with air.
Reason 7: Lost wheel key stock
Remember how we mentioned working on a paved surface?
This is exactly why.
A key stock is a small piece of metal (usually stainless steel) that locks your mower’s wheels to the wheel axles (on some mowers). These stocks can easily fall out when you remove or change your tires. They are very easy to lose in grass.
Replacing a wheel without a key stock in place will result in the axle spinning around in the wheel without engaging it to move as well.
Fix: Replace key stock
This problem is simple to solve. Simply retrace your steps to find where you might have dropped your stocks. If you cannot find them, you must find new ones.
Spin the affected wheel on its axle until you spot a gap (between the axle and wheel) you can fit a key stock in. Slip in the stock to seal the gap and lock the wheel in place.
Final Touches On Riding Mowers Not Moving Forward Or In Reverse…
Hopefully these suggestions can help you fix your riding mower mobility issues or at least send you down the right path. There are many ways that this annoying problem can occur.
We simply want to start up or mowers and get to work. Life doesn’t always work that smoothly. If you find yourself trying to troubleshoot this problem, try each of these avenues.
You may be surprised to find that something simple can fix the issue before taking your mower into a professional.
References